Hi, I'm Evelyn! You can call me Eve as well~^^
I'm currently taking Finance with Multimedia.
In this semester,we need to do 3 assignments for digital media 1. The first assignment is that we need to create E-wall paper. The title is FOM Open Day. Adobe Photoshop is used in this assignment. However, my internet server has problem. I had just upload half only. Also, the color of some pictures uploaded might have slightly different.
1) Firstly, I create a new file by clicking File>New and a new window will be popped out as shown below:
2) Secondly, I should choose the International Paper>A4 size as shown below:
3) Then, you should see a new document as shown in the photoshop like figure below.
3) Then, you should see a new document as shown in the photoshop like figure below.
From the above picture, it is clearly shown that it is in the form of portrait. On the contrary, if you want to create a new landscape file page, you should revert the values of the width and length in the new window:
This is the document in landscape format.
4) Next, I will select the first picture as the raw material.
The first picture selected as shown below :
5) Then, I decide to enlarge the chosen picture by using free transform option ( Edit>Free Transform ). In fact, you can also press Ctrl + T to create this effect.
The picture as shown below is enlarged fully.
The second picture as shown below :
7) Next, I use Quick Selection Tool to select the sign board of FACULtY OF MANAGEMENT.
8) After that, I open another new page and paste the respective selection that I just done.
9) Then, I use Free Transform to enlarge the picture.
10) After that, I select my third picture.
The third picture is as shown below.
11) Once again, I have done some selection. However, this time I have decided to use the Magic wand tool and actually the outcomes really amazes me^^.
12) I have also discovered that when I press Shift and click on the left mouse button simultaneously, the selection will be added. On the other hand, when I press Alt and click on left mouse button at the same time, the selection will be reduced.
13) In fact, I realise that the value of tolerance as highlighted on the panel of the picture below, will give different results.
14) For instance, by increasing the value on the tolerance, the selection on the object that I want will be in a larger area as compared before.
15) It happens that when I am doing this practice myself, my friend comes and guide me on using masking technique. These are the ways of doing this trick. This simple method is known as quick mask technique. It enables me to do my selection perfectly. By clicking on keyboard Q, you will see something like below. DON'T WORRY your software is running well and not having error which some of you may think so.. When you see the red color background, it means that the selection has done for the object you want and the red color areas are the spaces or the objects that you want to get rid off.
16) In general, when we are in the quick mask mode we can edit our selection using merely brush tool. The area to be selected will be depending on the foreground and background color. After that, if you face any problem you can always revert your steps by using the history feature in the photoshop. You can go to Window> History and you will see the history menu on the side. the below figures clearly show out whats the outcome of using history function.
17) As the result, when you click on keyboard Q once again, you will see that the balloon will be selected as shown below:
18) From the third picture, I use Polygonal Lasso Tool to select another balloon as shown below:
19) To smoother the selection of balloon, I click Paths on the tool bar in the right hand side, then click on the forth button below it, and it come out two words called Make work path from selection.. This enables me to change the selection that I have done to a path.
20) Once the selection has changed to a path, I can easily edit the path by editing the anchor points in it using the direct selection tool.
21) When you click on the path using the direct selection tool, you should be able see something as like below picture.
This picture reveals the result of using the direct selection tool on editing the anchor points.
22) However, a direct selection tool is not enough to ensure a clean selection. Therefore, a Convert anchor point tool is used for the sake of making the sharp edges to a smoother curve.
23) When dealing with path, we are actually dealing with anchor points and some of them are not needed. So, what should we do? Simple, it just requires a new option which known as the Delete anchor point tool. For your information, all the following tools: pen tool, freeform pen tool, add anchor point tool,delete anchor point tool and convert anchor point tool are actually under same category. You can find all these tools by clicking on the pen tool and hold it for few seconds. You can notice the others options if you do so. Awesome, right?
The process when I am deleting the anchor points.
24) If the anchor points for certain part is missing, you can add back the points to the respective path by clicking on the add anchor point tool.
25) In fact, if you are dealing with editing the anchor points, I strongly suggest you to zoom in your picture. This can be easily done by using zoom tool. If the picture is being zoomed to much you can always press alt and click the left mouse button at the same time. This is the way to zoom out the picture.
26) After I have done my editing and selection, I will copy it and paste it to the new page that I have created since beginning.
27) In the rule of multimedia, if everything is popping out and is very clearly to be seen, the design is very confusing as all the components are as if competing to get the attention from others. Therefore, I decide to change the opacity of the selected picture this time. This can be done by dragging the opacity value to a lower ones and this option can be found on top of the layer window.
28) Last but not least, I decided to use a scenery as part of my raw material, hence, I use the rectangular marquee tool to do a selection and paste on the new page.
After all the pictures are pasted on the same page, you must always rename the layer and arrange the layer if you want to do so. This is very helpful to prevent you from getting lost if your layer is too much and it enables you to identify the progress of your work.
29) Everytime we have finished our work, It is very compulsory for us to save our file. In this case, I will save my file into two formats: PSD-photoshop format and JPEG-image format.
This can be done by clicking on file and go to save as and you should be able see a pop out widow as followed.
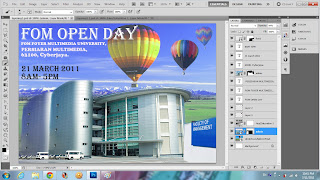
30) This is my final outcome for the raw materials that I have selected^^.
* By the way, the internet is quite slow lately so some of the pictures might have some problem or might not be a nice image...If the internet is getting back better connection, I will try to reupload again.
LAYERINg AND PHOTO RETOUCHING
Firstly, the picture I selected as the background is as shown below:
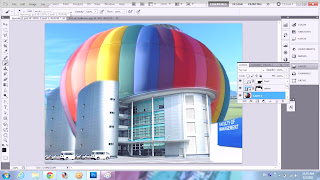
In order to enlarge the picture as shown below, I press Ctrl + T, then press Shift and the left click on the mouse.
Then, I select the next picture, and drag it to the right corner bottom of the first picture, which as shown below:
By using the Brush Tool on the picture " Faculty Of Management " board, the effect as shown below :
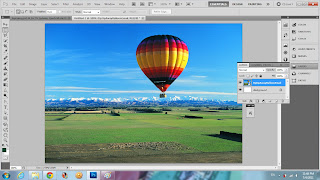
The third picture selected is as shown below :
After that, the following picture selected is shown as below :
After select on the hot air balloon which I want, then I press on keyboard Q and brush tool to apply quick mask technique.
Instead, zoom tool really useful, it helps to avoid me making mistake when applying quick mask technique.
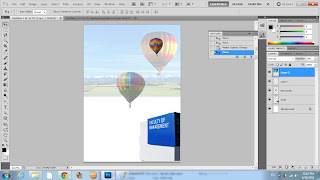
Subsequently, I copy and paste the selected hot air balloon, then drag it to the to the UpUpAwayBalloon layer which shown below :
Following by that, I press Ctrl + T, then press Shift and left click on the mouse, and the result shown as below:
As you can see, I also change the opacity of the hot air balloon.
Subsequently, I click on Horizontal Type Tool, and type the text " FOM OPEN DAY " as shown below :
The following text that I type is the address of the event take place:
After that, I type the date and time that the event occurs:
In order to change the color of the sky, I adjust the Hue of the picture as shown below:
Subsequently, I smoothed the following layer by using brush tool.
Next, I enhance the following layer by blending few of options such as drop shadow, color overlay and outer glow:
In order to make the shadow of the word can be seen clearly, I add the distance and the spread of the drop shadow structure.
Then, I continue enhanced the following text using the same method, which is the drop shadow and outer glow.
This time I do not use the color overlay, but have use bevel and emboss.
Subsequently, I press Alt and left mouse click to drag the same effect onto the following text:
By the way, I use lighting effect onto the following image to make my E-wallpaper more interesting.
Last but not least, I add on lens flare to further enhance my E-wallpaper.
When I check again my E-wallpaper that I have done,then only realise that the information I type is incorrect, and I correct it as shown below:
Finally, my E-wallpaper is officially finished and completed!


